| Elise Driving Lights Installation |
The following was posted on the Elise Talk forum. www.elisetalk.com
I installed the Factory Driving Lights on my Elise over the weekend.
First my car is one of the early non-prewired cars. This is a misnomer. The car is prewired for the driving lights, it does not have the wiring for the switch that goes under the regular head/parking light switches. The driving lights will come on whenever the high beams are on - which is exactly what I wanted anyway (it would be nice to have an off switch, but I really can't see a reason I'd ever use it.
One other difference between the early cars and the later cars is that the later cars are supposed to come with the mounting bracket installed on the crash structure - I had to install the brackets on mine.
The kit came with lots of parts, and many aren't used (but I think that sometime in the future, the switch may become useful as a "hidden" power switch if I ever install a concealed radar detector). The kit includes some nut inserts, but I made the mistake of attempting to install one - several hours later, I managed to finally get the spinning insert out of the hole. I used the nylock nut and washer instead.
The instructions that came with the kit was pretty useless - they pretty much say to attach the lights to the previous installed mounting bracket, then go into great detail about installing the switch in the light switch panel and installing the relay (which wasn't used/needed in my "non-prewired" car. There is no detail as to how to mount the brackets or the lights to the bracket.
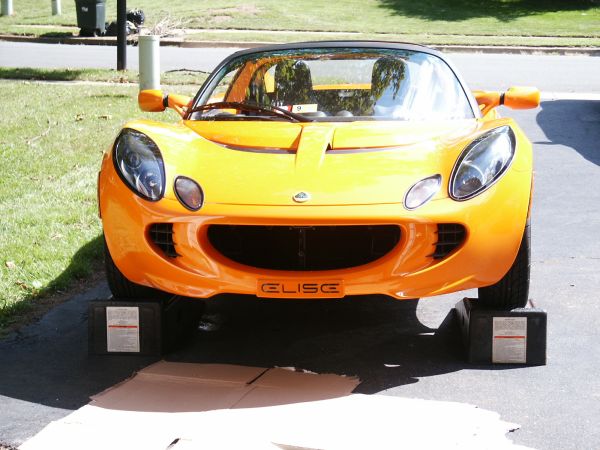
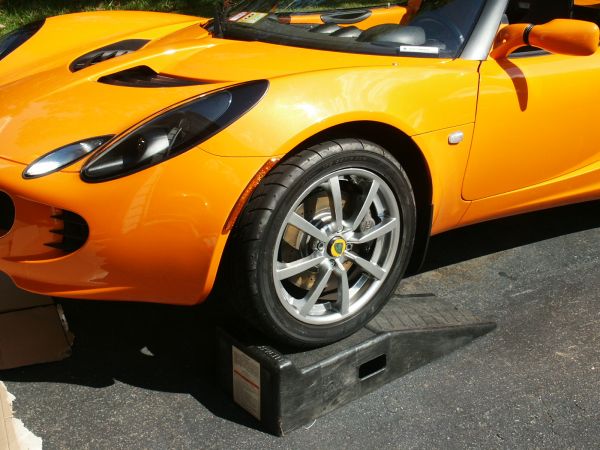
I started by putting the car up on RhinoRamps to make things easier to work on (I use the cardboard as a disposable
"pad" to insulate me from the hot blacktop, and to keep some of the dirt off of me):
The parts to install one side are shown below (forgive me, some of the photos didn't focus properly - my camera doesn't like close up shots):
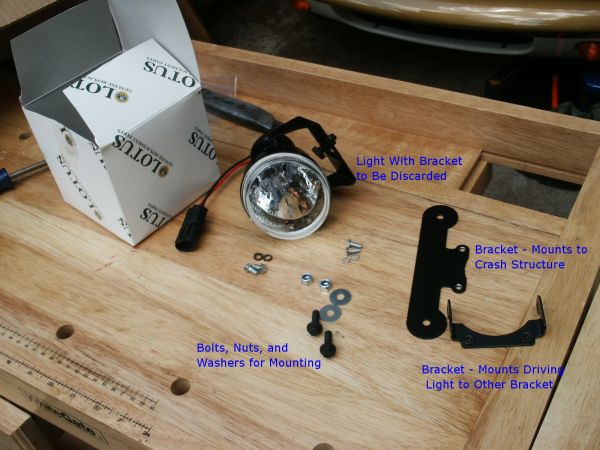
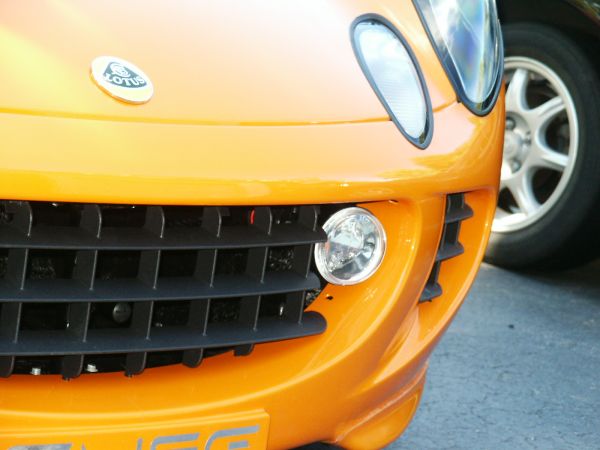
First thing necessary was to remove the existing bracket on the fog light and replace it with the bracket necessary to mount it to the Elise mounting bracket.
Easily seen in this out of focus picture:
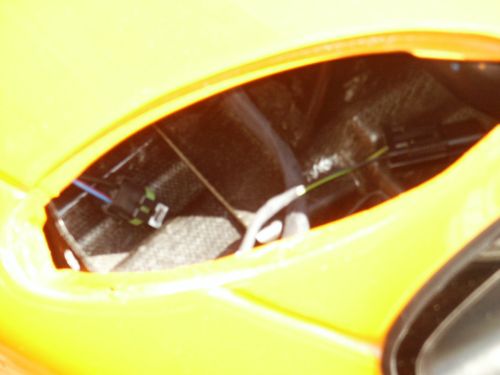
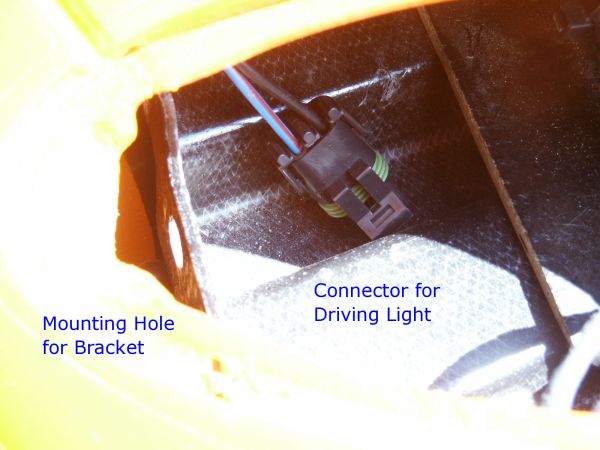
Then came the mounting of the bracket to the crash structure. You have to remove the grill to get to the "inside" mounting hole. The other one is under the turn signal assembly. Removing the turn signal assembly is both easy and difficult - if you push with the tool in the right place, it pops right out - feeling for and pushing at the right place can take a long time.
Once the assembly is out of the way, you can see the "outside" mounting hole, and you can reach in and find the
connector for the driving lights (I had to pull one loose from the tape that was wrapped around the connector and
harness to keep it from flopping around). The following photos show the opening, and a close up of the turn signal
opening and finally, the opening in the upper corner of the grill (all photos are of the right side of the car):
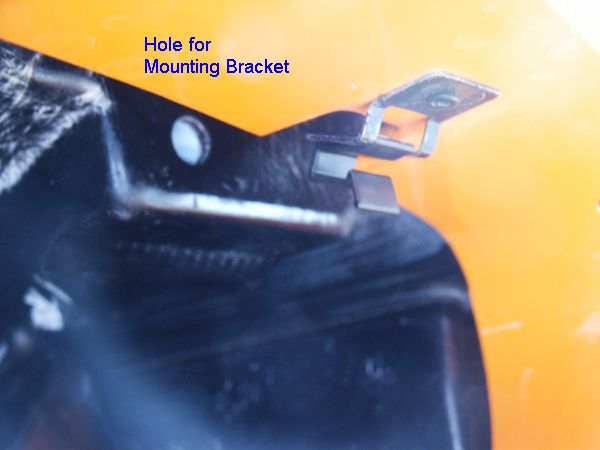
Mounting the bracket involved inserting the bracket from the grill. I slipped it in between the body and the crash structure until it was sticking up above the crash structure above the "outside" hole. Then the bolt was inserted into the hole on the bracket, and I lowered the bracket down until the bolt was lined up with the hole in the crash structure. Then the bolt was pushed into the hole. I applied some down force to the bracket to wedge the bolt in position so it wouldn't fall out (I had the under tray off for another reason so when I dropped the bolt/nuts/washer they would fall through and drop on the ground. However, one managed to fall into a rectangular "tube" in the structure and it took some finesse with a magnet tied to a string and a bent coat hanger to coax it back out - don't drop anything.
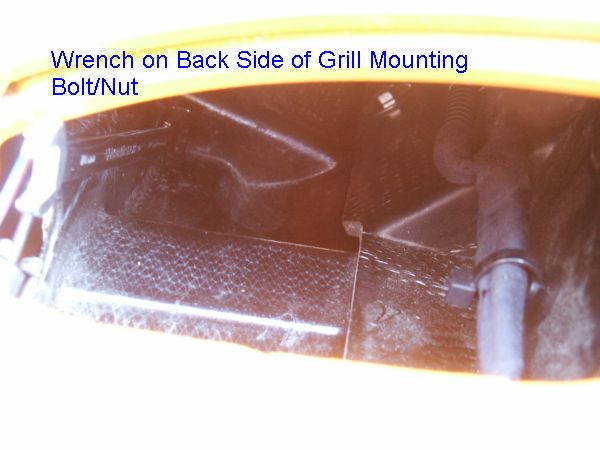
Once the bolt was in the hole, the washer and nylock nut could bet threaded onto the back side. The "inside" bolt was relativey easier - the bolt is easy to insert, and if you have small hands, you can reach into the hole and install the washer and nut. If you attempt to do this install, I highly recommend a set of GearWrenches - I'm not sure I could have fit even the smallest ratchet down inside to the rear of the "inside" hole, and the "swing arc" was way to small for tightening by hand.
Here's another bad picture of my wrench in on the "inside" nut (the other wrench was down in the grill area and easy to use):
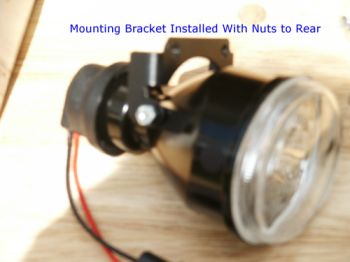
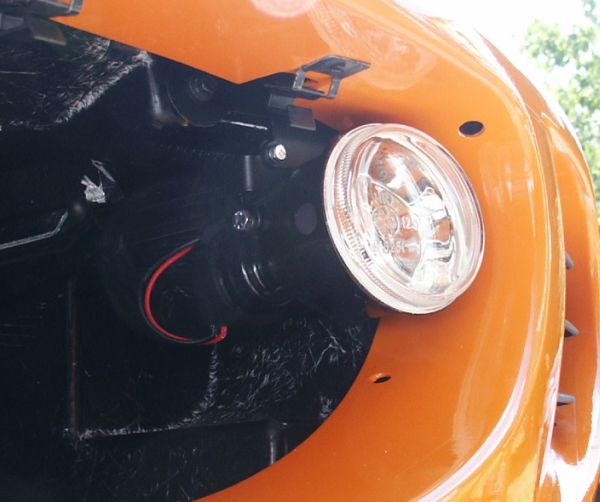
Once the mounting bracket was installed on the crash structure, the bracket that was installed on the driving light
is connected to the newly installed bracket. The driving light bracket is placed behind the mounting bracket, and the
two small screws are inserted through the mounting bracket and into the bracket attached to the driving light (the
nuts are welded to the bracket on the driving lights). Tighten down the bolts and plug in the connectos (that hand
down from above the crash structure, and finally, a completed, installed Driving Light:
The next step involved driving the car to a nearby underground parking garage to align everything. I removed the fender liners and head light covers (I had previously aligned the head light on my garage door, but it wasn't a very good job)
I pulled the car up very close to the wall, and marked the bright spots of the low beams with some tape on
the wall. Then I push the car back quite a distance and to a level spot (the floor is "up and down" for water
drainage. I then lined up the head lights according to the tape marks on the wall. Then came the high beams,
and the driving lights. The lights that were not be adjusted at the time were covered with a town taped to the
body (would have been nice to have the on/off switch for the driving lights for this step). Once everything
was adjusted, I drove the 2 miles home and reinstalled the covers and the fender liners and installed the new
grill that came as part of the kit. I actually forgot to take a photo of the completed project.