 PART II - More Than One Way to Skin A Seven
| The Reincarnation of SB1579 |
By Brian Johnson
PART I
After a few seconds of heavy haggling, the price was paid and I’d been had!… by a Seven. A Seven that had not run in over two years. As part of the deal, the Seven had to run well enough to drive from San Jose to my home in Burlingame. It did just that, as it disassembled itself on the freeway home. In route, in my newly acquired 1964 Series 2 Lotus Super Seven, the main event that took place was to lose the shifter lever somewhere inside the transmission tunnel just north of Palo Alto. From then on there was no more shifting. Just slow starts in fourth gear and just get the damn thing home. The next few days it was fix this and that and test the Seven to determine just how bad things were. As it turned out, the Cosworth 1340cc SCCA engine was quite straight with over 200 psi compression in each cylinder, and most of the gauges worked. But, that was about it. The Seven, as in most cases, needed a "complete" service! As expected a challenging project to say the least. And that is what this series of articles will be about. I shall try to cover the components of the car, over-hauled, the materials I used, the modifications I dreamed up and some of the sources of information I used. My methods maybe of the backyard shade tree mechanic type, but they worked for me.
THE LEG BONE CONNECTED TO THE HIP BONE, etc.
Mild steel tubing of various sizes and shapes is available at realistic prices from: Allied Iron Craft and Arts, 62 Waltermire, Belmont, CA (650) 591-6555. A crazy Italian named Louie owns the place. He is most helpful. Mild steel is also available from Alan Steel in Redwood City, but the people are not much help and tend to charge higher prices. If you go see Louie it may help to say Brian Johnson from the GGLC sent you.
PART II - More Than One Way to Skin A Seven
To skin a Seven there is the right way, the wrong way, and of course, my way.
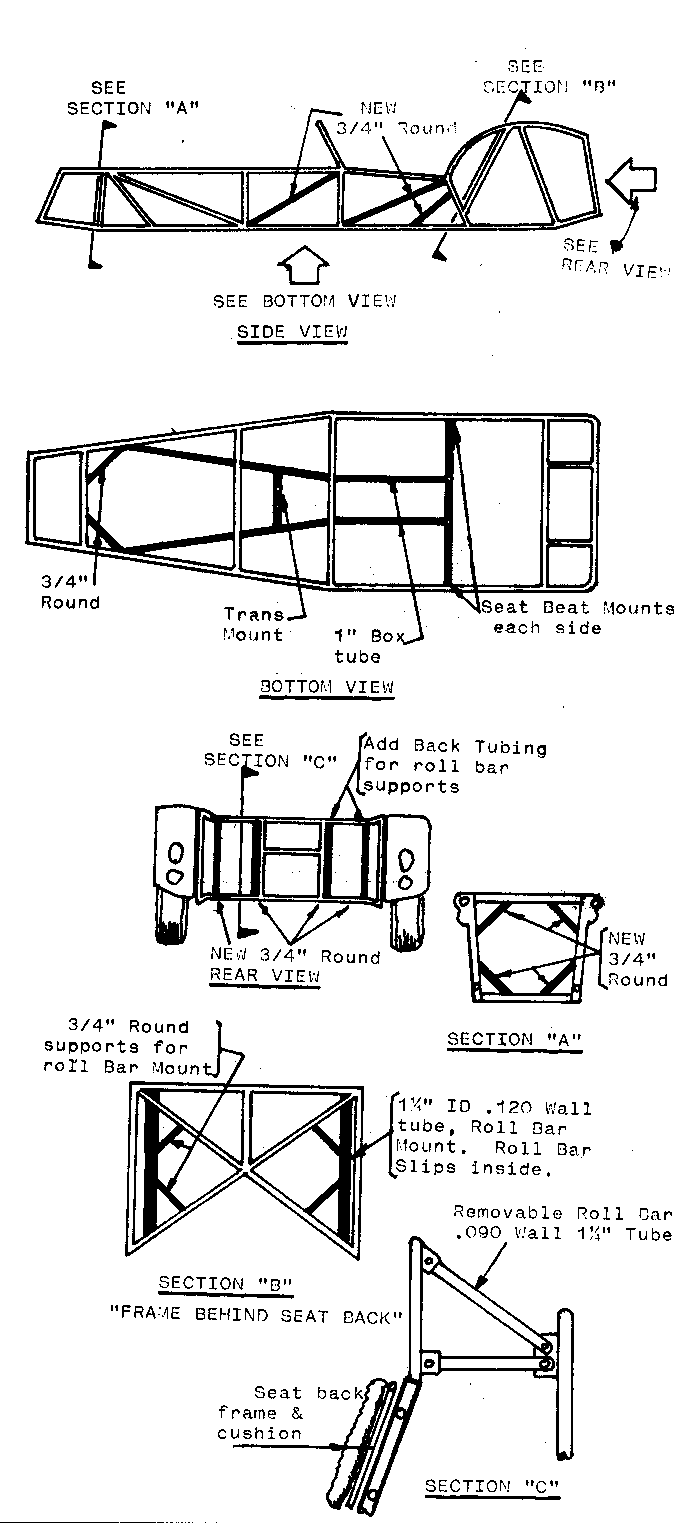
First after you’re finished with the frame, determine which panels you are going to replace, then weld up all the old rivet holes in the frame for those panels. Reason? So you don’t have to try to align old holes and new holes.
Rivets: I used Cherry Q-Rivets #BSPQ-52 and BSPQ-54. Cost: About $45 per 1000. I used 1500 rivets in all. The 52 rivets have a grip range of 0.0625 to 0.125 and the 54’s are 0.126 to 0.250. The #52 rivets is good for attaching one sheet of aluminum to a frame member (Aluminum of 0.032 to 0.040). The #54 rivet is used for two sheets of aluminum to a frame member.
Here are the specifications for the rivets: Cherry Q Rivet, BS series, aluminum rivet, steel mandrel, cad plated, grade 19, protruding head, BSPQ-52 and BSPQ-54, 5/32 diameter. Shear strength 700 lbs, tensile strength, 550 lbs. And MOST IMPORTANT, this rivet can be pulled with a hand operated rivet puller. Stainless steel and monel can not be pulled by hand. Also, stainless and monel cost at least twice the price. The Q rivet offers high strength because the steel mandrel plugs the entire length of the rivet, providing full shear strength values for structural or load bearing applications. Also, the mandrel is designed to stay in the rivet which seals the rivet and offers resistance to leakage.
Cherry rivets are available from Aero-land Supply Company, 831 Malcolm Rd., Burlingame CA 94010, (650) 697-6633.
Tools required for replacing panels would include aviation snips. I have found WISS snips to be among the best. They generally cost about $10 each. In order to cut a panel it requires 3 pairs of snips. A pair for left turn cuts, a pair for right turn cuts, and a special pair called "The Metal Master", which will cut long straight cuts without having to twist the panel as with standard straight cut snips.
Cutting panels is hard enough even with the right tool, so don’t make it harder by not having the right tools. It can be done with all 3 pair of snips. Of course, sheet metal shear and brake would be nice, but not everyone as access to them.
After the panel has been cut to size it is time to fit it on the car. To fit a panel and drill holes in the frame, first lay out the holes on the panel drill and deburr them. Now, the trick is to transfer the holes in the panel to the frame and have them line up. The trick is no trick at all, but a tool used in aviation body panel making. It’s called a Cleco. A Cleco is kind of a removeable pop rivet. It is installed and removed with special pair of pliers called Cleco pliers (What else!). Clecos and Cleco pliers are available from Aero-Land Supply for about $5 for the pliers and $0.50 for each Cleco. To do a large panel with 75 to 100 holes, about 40-50 Clecos are needed. Clecos are reusable hundreds of times. So, once purchased, you will always have them for the next time you do repairs.
To transfer the holes to the frame, you always start in the middle of the panel with the first hole. Drill the hole and insert a Cleco. Make sure the panel is straight, move up about four holes, drill hole and insert another Cleco. Check panel alignment again. Now, starting back at the middle of the panel, drill and insert Cleco in every other hole working always from the middle of the panel out to the edges in all directions at the same time.
After a panel is in place with Clecos, the panel can be marked, then removed, and more accurately trimmed for a perfect fit. Then file all sharp edges, clean panel, set it aside and move onto the next panel.
PART III – More Than One Way to Skin A Seven
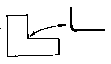
 the brake. Leaving it in the brake bend the aluminum around it achieving a small radius. About like this.
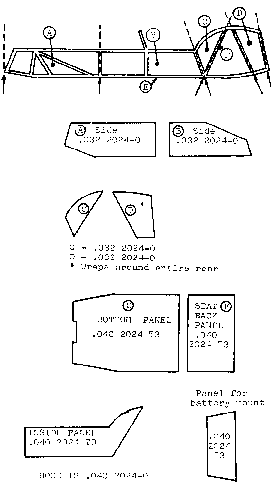
The outside panels should be made of 2024-0 0.032. This aluminum is soft and can be worked at home. It will bend easily by hand. The edges can be rolled over frame members and satisfactory, may be not professional, skin can be achieved.
 Sheet aluminum can obtained from Alan Steel and Supply Co., East Bayshore Road and Whipple Ave. in Redwood City, CA (650) 369-2526. This place is not cheap, but does have the type of aluminum required. They also have pop rivets that are not the type I described, but may work in a pinch. The whole car requires about 3˝ sheets (4 ft x 8 ft) of aluminum. About $350 total.
When finishing panels all should be drilled first or at least filed round to avoid cracking.
 To avoid cracks (radius) in large holes, such as where headers come through body or rack and pinion comes through body a double should be used. A doubler is like framing the hole with another thickness of aluminum.
To ease the body making project I divided the body up into smaller panels so as to not have to work with hard to create panels. Here are some of the panels.